Cubase
DarkStage follows Cubase's transport and counter through its own MIDI Remote integration — no control surface to assign.
Before you begin: install and launch DarkStage, open DAW Sync, confirm DAW Sync is running, and leave DarkStage open while you configure Cubase. See DAW Setup.
Cubase setup
Cubase connects through DarkStage's own MIDI Remote integration — there's no control surface to assign. It carries the counter (Bars + Beats, Seconds, Timecode and Samples) and Play, Stop and Record.
1. Select Cubase in DarkStage
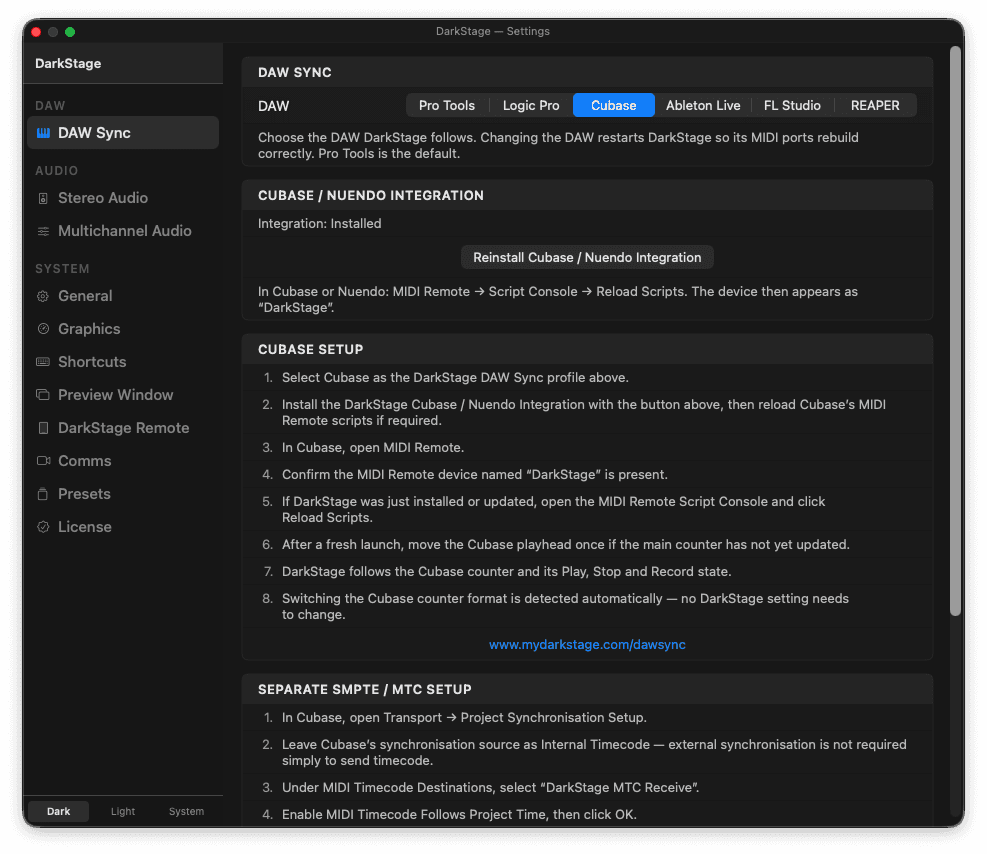
In DarkStage's DAW Sync settings, choose Cubase as the DAW.
2. Install the DarkStage integration
Install the DarkStage Cubase / Nuendo Integration from DarkStage's DAW Sync settings, then reload Cubase's MIDI Remote scripts if you're prompted to.

3. Open MIDI Remote in Cubase
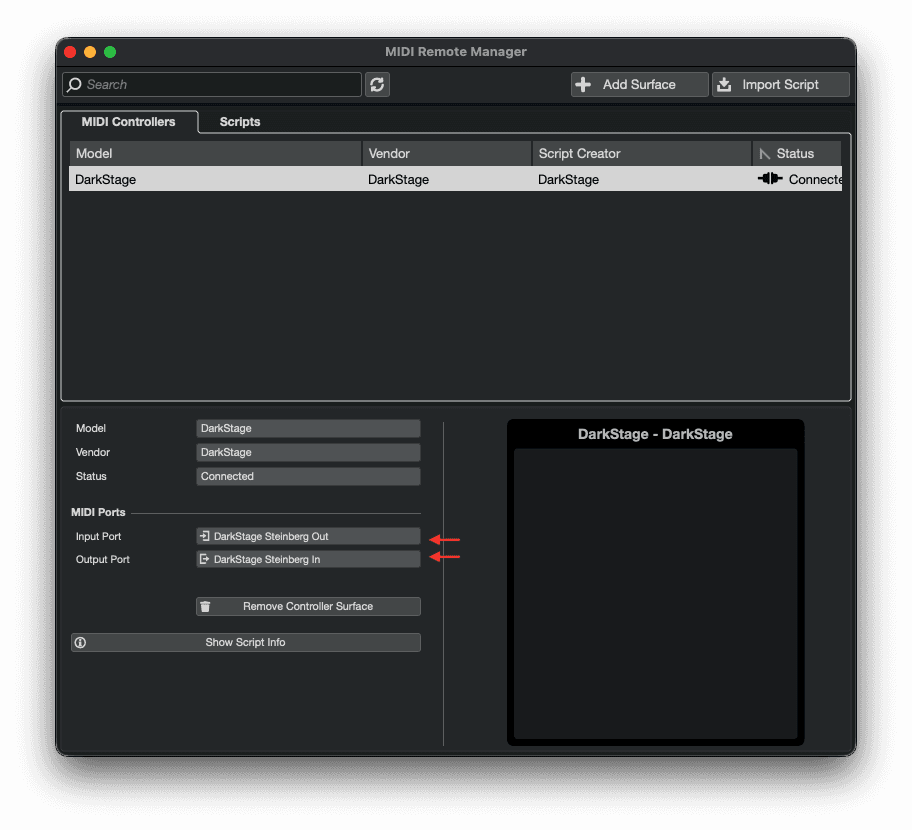
In Cubase, open MIDI Remote.
4. Confirm the DarkStage device
Confirm the MIDI Remote device with this name is present:
DarkStage
5. Reload scripts if needed
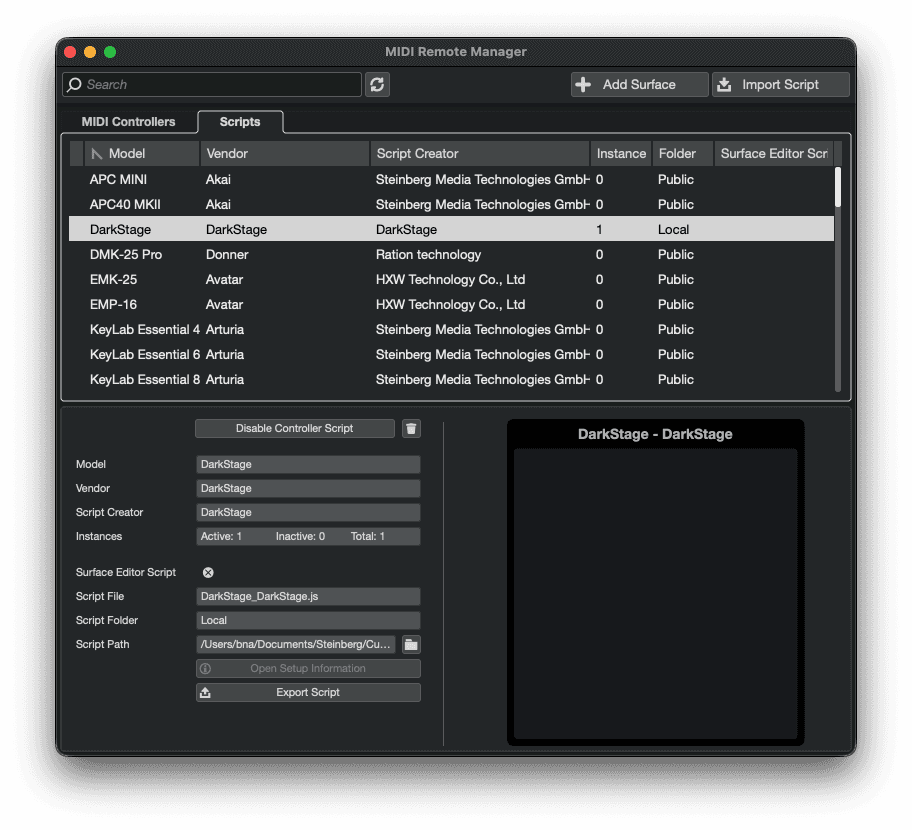
If DarkStage was just installed or updated, open the MIDI Remote Script Console and click Reload Scripts.
6. Nudge the playhead
After a fresh launch, move the Cubase playhead once if the main counter hasn't updated yet.
7. You're connected
DarkStage now follows the Cubase counter and its Play, Stop and Record state. Switching the Cubase counter format is detected automatically — no DarkStage setting needs to change.
Separate SMPTE / MTC setup
The MIDI Remote integration drives the main counter and Play / Stop / Record. MIDI Timecode drives the separate SMPTE widget. They're independent — set up both if you want both.
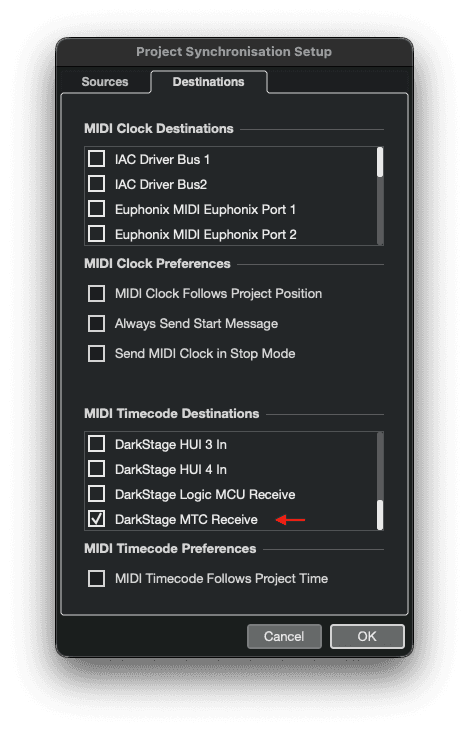
- In Cubase, open Transport ▸ Project Synchronisation Setup.
- Leave Cubase's synchronisation source as Internal Timecode — external sync isn't required just to send timecode.
- Under MIDI Timecode Destinations, select DarkStage MTC Receive.
- Enable MIDI Timecode Follows Project Time, then click OK.
- DarkStage's separate SMPTE widget now follows Cubase.
Cubase troubleshooting
- Counter not moving: confirm Cubase is the selected DAW, that the DarkStage MIDI Remote device is loaded, click Reload Scripts, then move the playhead once.
- Play / Stop / Record not following: confirm the DarkStage MIDI Remote device is still enabled in Cubase's MIDI Remote panel.
- SMPTE widget not moving: re-check Project Synchronisation Setup — DarkStage MTC Receive selected as a MIDI Timecode destination, and MIDI Timecode Follows Project Time enabled.
The integration installs only inside DarkStage's own folder under ~/Documents/Steinberg/<your Cubase>/MIDI Remote/Driver Scripts/Local/DarkStage, and never touches other scripts. If you have both Cubase and Nuendo, both are installed from the one payload.
Need more help?
Email support@mydarkstage.com and we'll help you get set up.